Friday, January 7, 2011

Want to use this pattern as an Upcycle Project? Now that I can help you with!

You will need an old pair of pants or capris, some elastic thread, a button, and the Summer Wonderland Dress pattern to complete this project.

To get all of your pattern pieces for the Summer Wonderland Dress, follow along...

First off, if there are any belt loops carefully snip them off - being sure to remove the threading and not cut any of the pants waist band fabric.

Where the waist band meets the legs, carefully remove the stitches, once again being careful not to cut the fabric. removing the Waist Band entirely from the pants.

Cut off the zipper and/or button closure, as we will not be using them as the closure for this dress.

This gives you the long strip of Waist Band fabric, which is open at the bottom seam.

Using your child's Chest Measurement, cut the Waist Band to size. My daughter measures at 20", adding 1/2" for seam allowance. Set Aside.

Laying the rest of the pants flat, we are going to measure up from the hem of the pants to the desired length of your dress. I want my dress to fall around the knees or slight below, so I am going to measure up 13" (the length from her chest to her knees). Using a ruler make a nice straight cut across both legs.

Cut open the stitches of ONE side seam on each pant peg that we just cut off. Set Aside.

Measuring how long you want your straps to be (the length around the top of the shoulder from the top of the chest to the top of where the dress would fall in the back), cut 4 straps from the remaining fabric. My daughter needs 9" long straps, adding seam allowance I cut (4) 10" x 2.5" pieces of fabric.

And that's it! You now have all of your pattern pieces needed to complete the construction of your Summer Wonderland Dress!

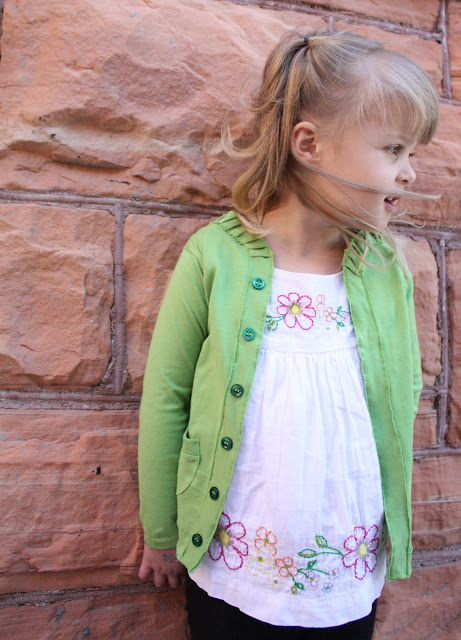
Why make a Summer Wonderland Dress in the middle of winter you ask? Well, because paired with the cutest little sweater, or possibly a ruffled bollero which I hope to show you soon, it becomes another perfect Holiday outfit for your little one!


Now I know we don't all have the same pair of ill-fitting pants, nor do we all have a willing 2-year-old, so I am going to offer some refashion guidelines and pointers for a successful refashion.


a the first refashion I did, I prided myself on the fact you couldn't tell what the new article used to be. I took a different approach with this project and incorporated and used to my advantage, features already constructed such as the buttons and zipper from the fly*. You can also omit features from the pattern like the buttons for the straps--I just sewed the straps as the zipper allows the in and out a 2-year-old needs from clothes.
b I liked the fly, but obviously the whole pattern piece I needed wouldn't fit there, so I added a seam. Simply cut your pattern piece [or trace on some freezer paper] and add a seam allowance to keep the piece as a whole the same size.
c the pattern called for a facing, but corduroy is so sturdy, it doesn't necessarily need any additional layers, so I finished the armholes with a strip of bias cut from the bottom of the leg.
d inspect the construction of the original piece and try to used similar methods, such as double stitching seams, which is often done on pants and jackets.
e I couldn't fit the two front pieces on a section of the pants without seams. This really bothered me at first, but then I thought, this is what I have to work with and decided to place the pattern piece right over the leg seam to add visual interest.
f use existing features to your advantage. Instead of adding another casing for the elastic in the center back, I inserted the elastic in the sides of the existing waistband.*
g once again adding seams in order to include the features on the pants, double stitching to match the original construction.

*note: If you use the original finished edges in your refashion, be sure to take out those hem/seam allowances from your pattern piece[s].

not shown in the layout: the straps and the bias strips cut from the lower leg


One more feature: Claim your Refashion! Add your own tag, or even sew a contrasting color
ribbon loop in one of the seams


The pattern I used for the jumper is a vintage pattern no longer in print, but you could use this McCall's pattern [view E], removing the leg seam and adjusting the outer seams to an A-line instead of straight.


The model I used was found wandering around, as she has now learned to escape from her bed.

Thank you, Cheri, for making me use my brain.
It was refreshing ;)
Gosh, I am so excited to part of Cheri's refashionista event. Not only because I LOVE Cheri and her blog, but also because I love to refashion. I love NOT loading up all my kids, NOT getting overwhelmed at the fabric store and NOT paying a boat load of money just to sew.
My favorite thing to refashion is a T-Shirt. Everyone has some and they're made of knit which means I don't have to finish my edges. Today I wanted to share how to make a cardigan out of a long sleeve T-shirt.


With the weather getting colder I needed some cardigans to help carry our summer clothes over to fall and winter.


I started with a long sleeve T-shirt. Don't follow my horrid example. Your shirt should be washed and pressed.


First step is to line everything up so it's laying flat. Next cut two 1" strips.


Then I used one of my daughter's T-Shirts for a pattern. I turned it inside out and pinned it at the arm holes.


I find it easier to cut up both sides and half of the top, then fold it over and do the other half of the top. That way I know it's symmetrical.


While it was folded in half I cut the neck line a little lower.


Next, I pulled out the sleeves of my pattern shirt and laid them on the fold of my T-shirt. I gave myself a couple inches on the end since I wanted the sleeves to be a little longer than the pattern shirt. If you're pattern shirt is the right length line it up at the end of the sleeve. Once it's lined up, cut up to the armpit seams.


To cut the curve at the top of the sleeve, I lined up the arm hole from the body piece. After I cut one sleeve I used it as a pattern for the other sleeve.


Next I drew a line down the middle of my front body piece and cut it in half.


I also curved corners of the front opening.


Now I had all my pieces. Two 1" strips, two sleeves, a back and front with an opening.


I pinned and sewed the front and back right sides together at the shoulders. You can finish your edges with a serger, but it's not necessary.


Next, I sewed on the sleeves. I opened the shirt pieces and laid them flat with the right side up. Then I lined up the middle of the sleeve with the shoulder seam and pinned them right sides together. I followed the curve on both sides and pinned every half inch or so.


It will look like this when your done. It should be a perfect fit, be careful not to pull or stretch the knit.


After the sewing the arms on, I sewed up the sleeve and and down the sides.


At this point I had the basic shape of a cardigan, but the edges, need stability so they don't roll.
I pinned one of the 1" strips along the bottom of the cardigan. Then I sewed it on, first with a 1/8" seam along the bottom of the strip and then a 1/8" seam along the top.


It will look like this when your done. I like the look of the raw edges, they will curl a little over time and with washing.


Now I used my second 1" strip and pinned it up the front opening, around the back and down the front on the other side.


I pleated it to help it go around the curve at the neck line. I didn't have enough length in one strip to make it all the way around the neck and back down with the pleating. I used a leftover strip from the bottom to get the length I needed. I pieced them together and hid my seam in the pleats.


The last step is adding the pockets. I like to cut mine from the original neckline, so it will have the ribbing at the top.


I cut two out, pinned them in place, and sewed them on with a 1/8" seam.


You could also add buttons down the front. They're not functional, just for looks. I didn't want to wreck the whole thing by trying to do perfect button holes.


I know we are going to get a lot of use out of this. I think it would be pretty simple to do a boy version, maybe take out the curve and pleating. I would also like to try one out for myself, by cutting a shirt up the middle and cutting out the neckline. You would need a second shirt or extra knit fabric for your 1" strips.


Feel free to stop by anytime to see some more refashions.
Thanks again Cheri, for inviting me to participate, I can't believe I'm blogging with some of the people I admire most.

christmas tree shirt

Ruffled Ribbon Christmas Tree Applique Tutorial


For those of you who followed the Hip for the Holidays series, you may remember this teaser photo. I had originally intended on creating a ruffled ribbon Christmas tree applique, but became distracted with sequined snowflakes. I figured that rather than shelving the project for next year, I'd show you the finished product.


For this project you will need:


6 strands of green grosgrain ribbon-I used two different shades of 2" ribbon.
1 scrap piece of brown ribbon

Sewing machine and thread
Scrap piece of fabric, larger than the size of the applique
Heat and Bond fusible adhesive
Onesie or other item to be appliqued
Embroidery Floss for star
Fray Check or a lighter


Use a gathering stitch (long stitch 4.0 with loosened tension 4 or 5) to stitch 1/4" away from the top edge of your strands of ribbon. Leave thread long on either end, and do not back stitch.
Gather your strands of ribbon by pulling on bobbin threads. Spread the gather evenly along the ribbon. When the ribbons are uniformly gathered, tie long threads at the end of each ribbon. This will keep your gather in place until stitched. Trim long strands of ribbon.

Attach your ribbon to your scrap piece of material. Stitch each strand on individually, starting at the base, and stitching along the original stitch line. Make sure that each additional layer of ribbon covers the stitching on the layer beneath.

Continue attaching ribbon, until all layers are attached to material.

Using a straight edge and marking pen, create a basic triangular tree shape.

Stitch along markings. Trim ribbon 1/8" outside stitch lines. Use fray check or flame to seal the edges of your ribbon.

Attach a piece of heat and bond to the back side of the trunk and base of tree.
Fuse the tree trunk to the item to be appliqued. Stitch close to edge of the tree trunk using your preferred stitch.
I attached my applique to my item using a triple stretch stitch. It is option number two on my machine. You will want to use a satin stitch if you have not sealed your edges.

Fuse the ruffled tree to the item, by heating the applique from the backside of your onesie or shirt. I did this in an attempt to avoid flattening the ruffles.

Stitch around the two sides of the Christmas tree, leaving the bottom edge of the base ruffle free.

If desired, trim your tree with sequins, small buttons, and a star on top. I used a bit of yellow embroidery floss to create a star for the top of the tree. A star shaped button, or a sparkly pom pom would be cute as well.

That's it, a simple and dimensional Christmas applique. As you can see in the last picture, I appliqued my tree to a scrap of white knit. I'm planning on saving it for a future day...just in case I end up with a girl that needs to be ruffled.

Interested in other dimensional applique ideas? Check out my Holly Berry Applique here.