Friday, March 26, 2010

Spring Dress

http://www.modabakeshop.com/2010/03/springeaster-dress.html
- 1 Botany Jelly Roll by Lauren and Jessi Jung
- 1/4 yd five different coordinating fabrics
- Coordinating thread(s)
- Elastic thread


*All seams are 1/4" unless otherwise noted.

Note: I made two different dresses at the same time, so pictures are from both dresses.

1. First we need to get some measurements. Measure child's chest/waist. Use whichever measurement is bigger and add 6". My daughter's was 22", so my measurement is 28". Next decide the desired length of the dress. For my 4T dress, I wanted it 27" long. Select 5 strips from the jelly roll. Next we need to do a little math.

Here's the formula: Desired length - 10" + 3.5" / 6.

Explanation:Each jelly roll strip is 2.5", so with seam allowances and five strips, we will get 10" of our desired length (27"), leaving 17" we need to get from our five coordinating fabrics. We need to add in hem and seam allowances of the coordinating strips, so add another 3.5". I used my top color twice, so divide by 6. ex: 27 - 10 + 3.5 /6 = 3.416. I rounded to 3.5". Did you make it? Now we are ready to cut.

2. Cut your top piece 3.5"" x 28"". (28 from chest/waist measurement, 3.5" from above formula). Cut your first jelly roll strip so it is 28" long. Cut 3.5" strips from all 5 coordinating fabrics. Cut two strap pieces 2.5" x 10". Lay out all your pieces in the desired pattern.
3. Take the two top pieces (the shorter ones: 28"). Sew right sides together (RST). Finish seam with either a zig-zag stitch or serger. Press, making sure to press the bulk of the seam towards the topmost piece. Topstitch.
4. Fold in half RST, lining up the two short raw end sides. Mark in 1/4" from the raw edges where your seam will be with pins, then line the pins up at 0" on a ruler. Find halfway and mark with pin. Mine was 13.5", so I marked 6.75" with a red pin. Go left 1/2" mark with a pin (mine is white), then add 3" from there and mark with pin (mine is another white pin). Draw a scoop between the white pins. Click on image to enlarge. Cut out the scoop. Unfold and you should have two cut-outs. These are for the arms. Now we need to hem the top. Make a few small clips in the arm holes (this will make it easier to fold for the hem).Fold the top raw edge (the one with the scoops), down 1/4" towards the wrong side of the fabric and press. Fold down another 1/4" and press. Stitch down. Set top piece aside.

5. Grab your very bottom piece and hem it with a 1/4" hem like we used above.
6. Stitch remaining pieces (all the 44" length jelly roll strips and coordinating fabrics) together in desired order. Finish seams. Press and topstitch, switching threads as necessary if doing multiple colors. You should now have a top and bottom piece.
7. Fold bottom piece in half RST, lining up the seams and pinning in place. Stitch. Finish seam. Do the same with the top piece.

8. Sew a gathering stitch along the raw edge of your bottom piece. Divide both the top and bottom pieces into 1/4's and mark with pins. Place the top piece inside the bottom piece RST, and raw edges lining up, and match up the pins. Pulling on the bobbin thread, gather the fabric between pins and pin frequently to hold the gathers in place. Make sure to change your stitchlength back to a regular stitch and stitch. Finish seam. Press and topstitch.

9. Next we are going to do some shirring. Lay your dress facedown. Mark about 1 1/2" in from each side with pins. Handwind a bobbin with elastic thread. You don't want to stretch it as you are winding or it will be too tight. Load the elastic thread in your bobbin and keep regular thread in the top. Starting 1/4" down from the hem stitching, sew between the two pins, making sure to backstitch really well at the start and stop. Continue the next row 1/4" down from the row you just made. Sew about 10 rows or so, just enough that you have sewn down the top two strips of the dress. Press those rows and watch the fabric shrink up to create the smocking.
10. Let's get those straps done. Fold in half lengthwise and sew RST. Turn inside out and press with the seam in the middle of the strap. Topstitch the long sides of the straps. To figure out where to attach the straps, I grabbed my daughters and slipped the dresses on them, then pinned the straps in place. Stitch the straps in place by going right over the hem stitching. Trim excess fabric on straps, if necessary, and finish the raw edges. Guess what?! You are ALL DONE!!! Back view: 
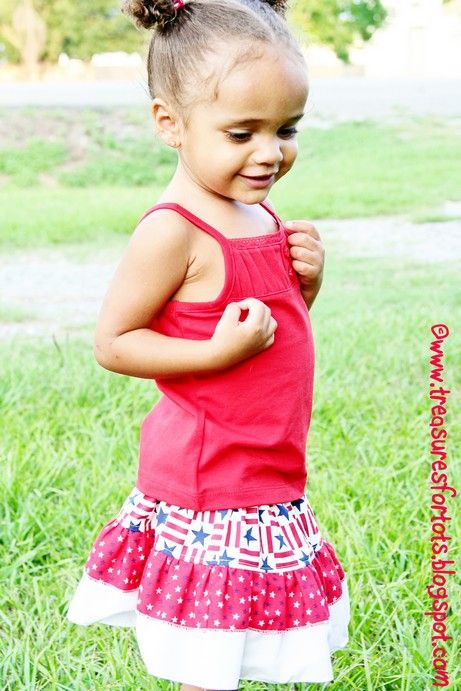
Add a cute matching fabric flower using this tutorial and you have one springy, happy, little lady (or in my case two)!

Fabric Flowers

http://theidearoom.blogspot.com/2010/01/peachycheap-winner-and-fabric-flowers.htmlI simply took 5 different colored polka-dot materials and cut from each a strip that measured 2 inches in width and 12 inches in length. Then I simply folded the strip in half lengthwise and ironed it flat.


Then I sewed down the side with the raw edges a 5/8 inch seam (which was right on the edge of the foot pedal). Then I simply pulled one of the strings on each end to gather the material into a ruffle.


Then I rolled the ruffle up into a circle making sure that all the ends are even.


Take a needle and thread and sew the bunched ends together.


Now turn the flower over and use your needle and thread to sew it together from top to bottom. Be sure to capture any loose ends.


Then I simply figured out where I wanted to place each flower on the shirt. Once you have decided, sew each flower onto the shirt by hand.

Thursday, March 25, 2010

Ruffle Skirt

http://treasuresfortots.blogspot.com/2009/07/double-ruffle-twirl-skirt.html
Double Ruffle Twirl Skirt:

Measure your little girl to determine how long you'd like the
total length of her skirt to be. I wanted Serenity's skirt to be 9" long {after sewing}, then I added 2" {for total seam allowances}, that equals 11" long total length*.

Figure out how long you want the
skirt and the first ruffle to be; just make sure those two numbers equal the total length of the skirt.

For example, I cut Serenity's skirt 6" long and the first ruffle 5" long - for a
total length of 11". For the second ruffle, I just subtracted 2" from the first ruffle - so I cut a 3" long second ruffle.

You'll need to cut
2 strips that are 43" wide for both sets of ruffles. For Serenity's skirt, I cut 2 strips 5"L x 43"W for the first ruffle, and 2 strips 3"L x 43"W for the second ruffle.

As for the width of the skirt, I cut selvage to selvage, and then cut that in half. After sewing, the skirt ends up being about 43" wide. I think that makes a nice twirly skirt for at least up to 4T - for a more twirly skirt on older children, you might want to add more width.

I used a
1/2" seam allowance {pretty much anyways!}.

Click on the pictures to zoom in if you need to see them a little better!

Serenity is a size
2T. These are the pieces I cut out to make her skirt:

2 - 6" L x 28" W of Skirt Fabric
2 - 5" L x 43" W of First Ruffle
2 - 3" L x 43" W of Second Ruffle
1/2"W elastic - cut it 1/2" smaller than your child's waist - or however long you need it to fit your child.


With
right sides facing, sew the skirt fabric on both of the short sides to form a circle.


Roll hem all ruffle pieces {
or you can serge the ends or make a simple double-turn hem: fold over 1/4", iron, then fold 1/4" again, iron and top stitch 1/4" from edge}. Match the ruffle pieces, and with right sides facing, sew along all the short sides, forming large circles. Serge or zig-zag all the seams on the skirt and ruffles, then iron.

You now have three pieces.


Lay the second ruffle on
top of the first ruffle, match up the seams and pin. Continue to pin the ruffles together all the way around.


Set your machine on a
wide zig-zag stitch, line up some upholstery thread or dental floss on top of the fabric, and then zig-zag over the upholstery thread starting right before one of the seams. Or you can just do a long gathering stitch, but it'll be tough to gather two layers of fabric at one time using only a gathering stitch!


Remove all the pins
except the one closest to the gathering thread. Pull the gathering thread until the piece is the same width as the main skirt. Wrap the gathering thread around the pin to hold the ruffles in place, and then arrange the ruffles evenly.


With the
right sides together, match the skirt and ruffle seams together, then pin. Continue pinning the ruffle to the skirt all the way around. Use LOTS of pins!


Sew the ruffle to the skirt.
Take your time and be sure to straighten the ruffles as you sew.


Serge or zig -zag the seams.


At this point, serge around the top of the skirt if you have a serger, if not, skip this step
**.
Pull
out the gathering thread, and then iron the ruffle seam up towards the top of the skirt.


Top stitch
1/4" to hold the ruffle seam in place.


Using an Dritz Ezy-Hem {or gauge, or template}, iron the
top of the skirt down 1".


Top stitch all the around the skirt
1/4” from the top, then 1” from the top of the skirt to form a casing. Make sure to leave a 1” opening for the elastic.


Attach a bodkin {or safely pin} to the end of the elastic and pull though the casing.


Stitch the elastic together {I used a triple stitch}, then top stitch the opening closed - remember to back stitch
or you can triple stitch it closed.


Stitch "in the ditch" on both of the side seams to stop the elastic from twisting. Don't worry if you can't stitch "in the ditch" perfectly - it doesn't have to look pretty 'cause you'll barely see it!

That's it, you're all done! Get your DD to try it on, and then pose for a couple a pictures {or you can chase after her with a camera like I did with Serenity!}, to capture her in all her cuteness!


Serenity's 4th of July skirt! {2T}


Cobee Lynn's 4th of July skirt! {3T}


*Add an extra 1" to your total skirt length if you don't have a serger.*

**If you don't have a serger: Using a Dritz Easy-Hem {or gauge or template or specialty foot}, make a simple, double-turn hem on the bottom of the skirt: fold over 1/4", iron, then fold 1/4" again, iron and top stitch 1/4" from edge.

Then fold the
top of the skirt down 1/4", iron, then fold down another 1". Top stitch ¼” from the edge, then 1” from the edge to form the casing. Leave a 1" opening for the elastic. **

POST-IT NOTE: I used these measurements to cut out the pieces of Cobee Lynn's skirt {3T}:

2 - 7" L x 28" W of Skirt Fabric
2 - 6" L x 43" W of First Ruffle
2 - 4" L x 43" W of Second Ruffle

Cinched Bag

http://makeitandloveit.blogspot.com/2009/02/bagfrom-tea-towels.html


(But you don't have to find any extra thick tea towels. Any will do just fine.)

I'd love to say, it's a "Quick and Easy" bag tutorial but we won't all feel the same way about it. Yeah, yeah, I've said it in the past and probably shouldn't say something's "easy" anymore. Because for some, it's dang hard. Just like growing tomatoes is HARD HARD HARD for me. So here's a tutorial for a pretty difficult and frustrating bag. I'm not even sure you should attempt it. You'll probably get so mad at my directions that you'll throw your boot at the computer monitor. Sorry. (Did the reversed psychology work?? Now, if it works out better than this, you can consider yourself a seamstress........and I promise it really is pretty basic. Give it a try!)

You'll Need:

  • 3 tea towels, 2 of which are the same color. (my towel dimensions were 29 x 20.5 inches.)
  • Coordinating thread
  • Sewing machine

First, lay your tea towel in front of you vertically. Then you're going to cut squares out of the 2 bottom corners of each towel that are 3.5 x 3.5 inches.


Then you will fold the two sides of that 3.5 x 3.5 inch square together, with right sides together.


Then pin it together.


Do this to both corners of the tea towel.....and then the same thing to the other tea towel.


Sew 1/2 inch seam down the 3 1/2 inch side and then sew another zig-zag seam right next to it, to reinforce it. Do this to all 4 corners. (We are making the bottom 4 corners of our bag.)


Now, depending how tall or short you want your bag, you're going to cut some length off the top of each tea towel. I cut off 7 inches. You can do more or less.....

*****At this point, make sure that both towels are the same length from top to bottom. If not, trim and adjust. It's easier to do this now, rather than later after you've started putting everything together. This will ensure that the two sides of your bag will fit together evenly, when you sew them together later on.**********

Then Fold down the top, (right where you cut off the 7 inches), about 1/2 inch, and then another inch. Sew this top hem into place.

Next, you're going to cut your straps and middle ties. Cut all of the hems off of all 4 sides of this 3rd towel. Now divide the towel into 4 even sections and cut. Make sure you are cutting the long way, to ensure that you are going to have long enough handles and ties.


Now you'll need to sew each strip in half, long ways, and sew a 1/4 inch seam down the side to close up the straps and ties. Sew another zig-zag right next to that. Turn it right side out and press flat, with the seam towards the back. The ends for the straps can be left unfinished for right now. But you'll need to finish all the ends of the ties. Tuck the frayed end of the fabric inside of the tie, about 1/4 inch. Press. Do the same thing to both ends of the 2 ties. Then sew around all four sides of the ties, really close to the edge. Now, sew down both sides of the straps, with the ends still unfinished. Set the straps aside.

Next, you're going to pin the ties to each towel. Measure to find the middle of the towel and the middle of the strap. Then measure down 4 inches from the top of the towel and pin the strap in two places, 5 inches apart. See the little yellow and pink pins? They are 5 inches apart and centered on the bag. (Do this to both towels.)


Now, you're going to pin the straps on. But first, fold one end of the strap down about 1/2 inch.....


.........and then attach it to the backside of the main towel. Make the bottom of the strap (where the fold is) even with the bottom of the hem at the top of your bag. Do this to the other end of the strap and place the strap ends about 3 inches apart. (Make sure that the back side of the strap, where the seam is, is facing towards the inside of the bag. So you can't see it from the outside, while holding the bag.)


Do this with both straps, on both towels. Now that you have the straps and the ties pinned, you need to move on over to the sewing machine.

Sew each strap in place with an X with a box around it and sew the straps in place where it's pinned, in a tall rectangle shape. Or you could even just do a line to secure it. Either way works.


Now, you are going to sew the 2 sides of the bag together. You aren't going to sew right sides together. You're just going to lay one side hem on top of the other side hem and sew one continuous line, all the way around the bag.


Then sew another seam right next to it, about 1/4 inch away. This will help reinforce your bag, so that it can carry more weight. Now, tie the two ends of each tie together on both sides of your bag, cinching it in a bit. Kind of gives it a sassy look. Throw some things inside........ And you're done.

Oh, and I added that little blossom diddy on the front. I just cut out circles of the leftover towel that I cut off from the top, layered them one on top of the other, sewed them together in the middle, and then added a button like the one HERE, covered in the towel fabric. Then I just hand stitched it right to the bag.


***After I finished, something that I might do differently........is before sewing the top hem of the bag and before adding the ties and the straps, sew the bag together first along the bottom and sides, then fold and hem the top down. Then add the ties and straps. This way, the two top sides of the bag don't have to be EXACT before sewing them together. You can just fold the top down 2 times and sew all the way around, hiding the uneven sides, if you have any. Might make it easier if you can't get your two towels to be perfectly even in length.