Double Ruffle Twirl Skirt:
Measure your little girl to determine how long you'd like the total length of her skirt to be. I wanted Serenity's skirt to be 9" long {after sewing}, then I added 2" {for total seam allowances}, that equals 11" long total length*.
Measure your little girl to determine how long you'd like the total length of her skirt to be. I wanted Serenity's skirt to be 9" long {after sewing}, then I added 2" {for total seam allowances}, that equals 11" long total length*.
Figure out how long you want the skirt and the first ruffle to be; just make sure those two numbers equal the total length of the skirt.
For example, I cut Serenity's skirt 6" long and the first ruffle 5" long - for a total length of 11". For the second ruffle, I just subtracted 2" from the first ruffle - so I cut a 3" long second ruffle.
You'll need to cut 2 strips that are 43" wide for both sets of ruffles. For Serenity's skirt, I cut 2 strips 5"L x 43"W for the first ruffle, and 2 strips 3"L x 43"W for the second ruffle.
As for the width of the skirt, I cut selvage to selvage, and then cut that in half. After sewing, the skirt ends up being about 43" wide. I think that makes a nice twirly skirt for at least up to 4T - for a more twirly skirt on older children, you might want to add more width.
I used a 1/2" seam allowance {pretty much anyways!}.
Click on the pictures to zoom in if you need to see them a little better!
Serenity is a size 2T. These are the pieces I cut out to make her skirt:
2 - 6" L x 28" W of Skirt Fabric
2 - 5" L x 43" W of First Ruffle
2 - 3" L x 43" W of Second Ruffle
1/2"W elastic - cut it 1/2" smaller than your child's waist - or however long you need it to fit your child.

With right sides facing, sew the skirt fabric on both of the short sides to form a circle.

Roll hem all ruffle pieces {or you can serge the ends or make a simple double-turn hem: fold over 1/4", iron, then fold 1/4" again, iron and top stitch 1/4" from edge}. Match the ruffle pieces, and with right sides facing, sew along all the short sides, forming large circles. Serge or zig-zag all the seams on the skirt and ruffles, then iron.
You now have three pieces.

Lay the second ruffle on top of the first ruffle, match up the seams and pin. Continue to pin the ruffles together all the way around.

Set your machine on a wide zig-zag stitch, line up some upholstery thread or dental floss on top of the fabric, and then zig-zag over the upholstery thread starting right before one of the seams. Or you can just do a long gathering stitch, but it'll be tough to gather two layers of fabric at one time using only a gathering stitch!

Remove all the pins except the one closest to the gathering thread. Pull the gathering thread until the piece is the same width as the main skirt. Wrap the gathering thread around the pin to hold the ruffles in place, and then arrange the ruffles evenly.

With the right sides together, match the skirt and ruffle seams together, then pin. Continue pinning the ruffle to the skirt all the way around. Use LOTS of pins!

Sew the ruffle to the skirt. Take your time and be sure to straighten the ruffles as you sew.

Serge or zig -zag the seams.

At this point, serge around the top of the skirt if you have a serger, if not, skip this step**.
Pull out the gathering thread, and then iron the ruffle seam up towards the top of the skirt.

Top stitch 1/4" to hold the ruffle seam in place.

Using an Dritz Ezy-Hem {or gauge, or template}, iron the top of the skirt down 1".

Top stitch all the around the skirt 1/4” from the top, then 1” from the top of the skirt to form a casing. Make sure to leave a 1” opening for the elastic.

Attach a bodkin {or safely pin} to the end of the elastic and pull though the casing.

Stitch the elastic together {I used a triple stitch}, then top stitch the opening closed - remember to back stitch or you can triple stitch it closed.

Stitch "in the ditch" on both of the side seams to stop the elastic from twisting. Don't worry if you can't stitch "in the ditch" perfectly - it doesn't have to look pretty 'cause you'll barely see it!
That's it, you're all done! Get your DD to try it on, and then pose for a couple a pictures {or you can chase after her with a camera like I did with Serenity!}, to capture her in all her cuteness!

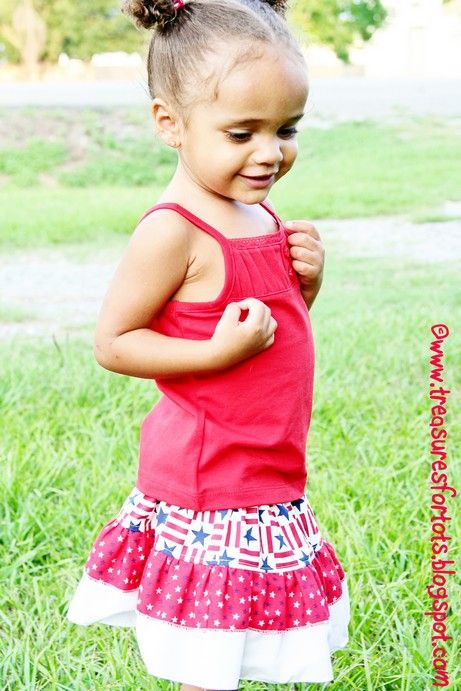
Serenity's 4th of July skirt! {2T}

Cobee Lynn's 4th of July skirt! {3T}
*Add an extra 1" to your total skirt length if you don't have a serger.*
**If you don't have a serger: Using a Dritz Easy-Hem {or gauge or template or specialty foot}, make a simple, double-turn hem on the bottom of the skirt: fold over 1/4", iron, then fold 1/4" again, iron and top stitch 1/4" from edge.
Then fold the top of the skirt down 1/4", iron, then fold down another 1". Top stitch ¼” from the edge, then 1” from the edge to form the casing. Leave a 1" opening for the elastic. **
POST-IT NOTE: I used these measurements to cut out the pieces of Cobee Lynn's skirt {3T}:
2 - 7" L x 28" W of Skirt Fabric
2 - 6" L x 43" W of First Ruffle
2 - 4" L x 43" W of Second Ruffle

No comments:
Post a Comment